Zakeke
Zakeke is a product customisation tool which you can link to your ShopWired account to allow your customers to customise your products before placing an order. Orders that are placed that contain Zakeke products will then be automatically exported to Zakeke.
To configure Zakeke to work with your products, you will first need to install the app. To install the app select from the menu. Find and select the Zakeke app and select INSTALL THIS APP.
• Connecting your accounts
• Adding code to your live theme - Version 3 and Version 4 themes
• Adding code to your live theme - Version 2 and earlier themes
• Adding code to platform checkout
• Creating configurable and customisable products
• App settings
• User experience
• Order export errors
Connecting your accounts
Once you’ve installed the app select from the menu. Use the ‘Zakeke Account’ section to connect your Zakeke and ShopWired accounts:

In a new tab login to your Zakeke account. If you don’t have a Zakeke account, you can open one here.
Then click here to access the connections page in your Zakeke account.
From the choices of available integrations, select the API option:

Enter the URLs from your ShopWired account in the ‘Store URL’ and ‘Products API’ boxes:
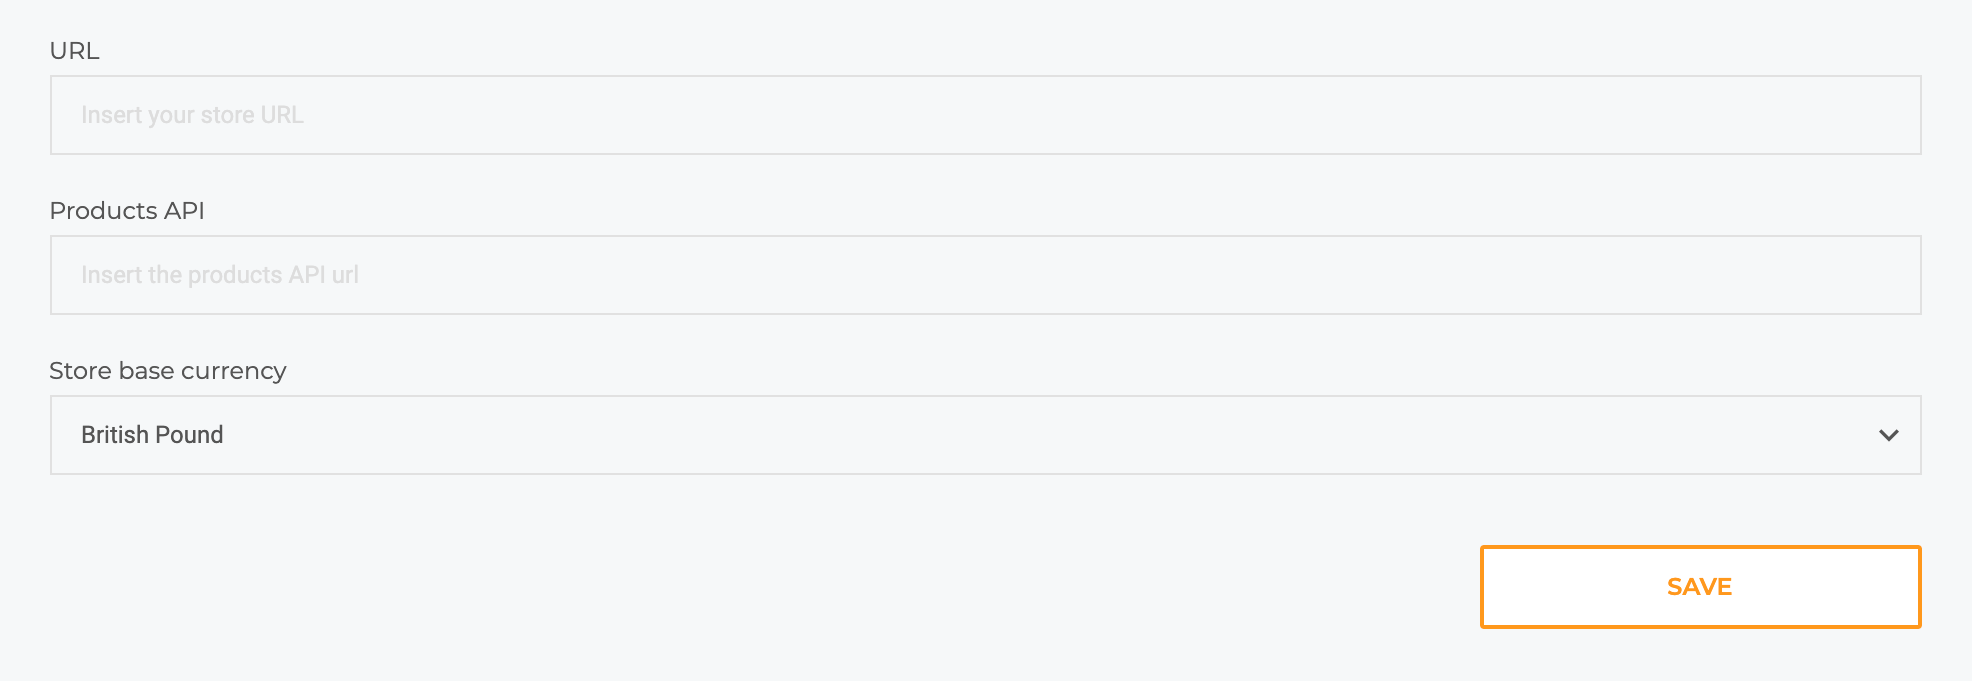
Then make sure the selected base currency on Zakeke matches the base currency used in your ShopWired store, and save your changes.
Next, within your Zakeke account, select Your Account > API Keys from the top right corner:
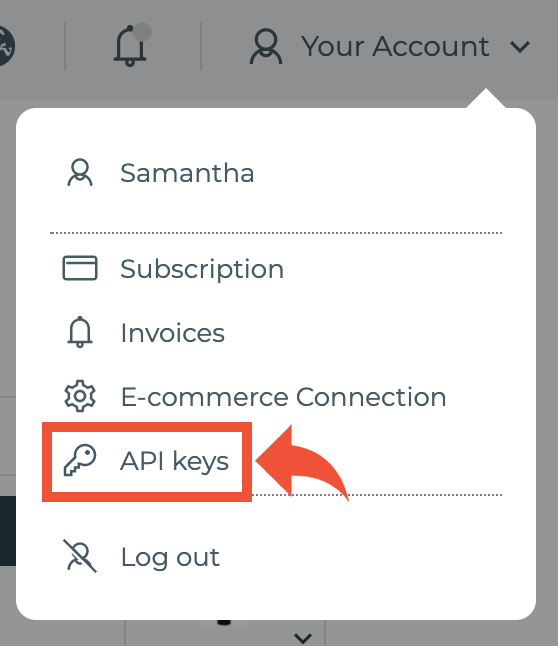
Copy the API credentials and paste them into the appropriate box within the ShopWired app configuration page:

Please note!
If at any point you select to generate new API keys, your accounts will no longer be connected until you input the new API credentials.
Then select connect. If you have entered your credentials correctly, the section will then show as ‘Connected’.
Adding code to your live theme - Version 3 and Version 4 themes
Version 3 themes!
If you are using a version 3 theme, your theme might be slightly different to the examples found below. Please contact us for help with installing the code.
In order for the app to display the customiser and configurator on relevant products, you will need to add some code to your live theme. By following the instructions below, you should be able to add this code yourself even if you have no coding experience, but if you do get stuck, please contact us.
To add code to your live theme’s files first select from the menu. Then select Page Editor for your live theme:

Step 1
You will then need to locate the product_form.twig file by selecting from the menu of the page editor.
This file is made up of blocks which generate the content on the products’ pages of your website. Locate the product form block which will start with {% block product_form %}:

Scroll down to the end of that block, but be careful that you don’t scroll too far and find the end of a different block. The block will end with the code {% endblock %}:

Please note!
Every block of code ends with {% endblock %}, so be careful that you have found the end of the correct block.
Create a new line before the {% endblock %}, and then paste the following code:
<script src='https://portal.zakeke.com/scripts/config.js'> </script>
<script src='https://portal.zakeke.com/scripts/integration/api/customizer.js'> </script>
<script>const mainProduct = {{ product|json_encode|raw }}; </script>
<script data-business-id='RANDOMLY-GENERATED-BUSINESS-ID' class='main-zakeke-script'
src='https://hq-apps-sw.s3.eu-west-1.amazonaws.com/zakeke/1/v3/zakeke.js'> </script>
Within the above code, you will need to replace RANDOMLY-GENERATED-BUSINESS-ID with the business ID that was generated for your account when you installed the app.
Warning!
If you uninstall and reinstall the app, your randomly generated business ID will change. If you have already added the code into your theme's files, you will need to go through and update the code with your new business ID.
To find the code, navigate to the Zakeke app installation page in a new tab. Open the 'Live Theme Codes' section. Your Zakeke business ID is located at the top of the section:

Copy the ID and paste it in place of RANDOMLY-GENERATED-BUSINESS-ID.
Once you’ve entered the code, it should look something like this:

Step 2
Also within the product form block within the product_form.twig file, locate the <select code that contains class="product-option required". This will look something like this:

Helpful hint!
You can use ctrl + F on a Windows or Command + F on a MAC to help you find the code you are looking for.
Before the closing tag (>) add the following code:
data-option-id="{{ option.id }}"
The line should then become something like this:
<select name="value[]" class="product-option required" data-option-id="{{ option.id }}">
Which will look like this within the code:

Step 3
Next, within the product form block, locate the <div code that contains class="product-option". This will look something like this:

Before the closing tag (>) add the following code:
data-option-id="{{ option.id }}"
The line should then become something like this:
<div class="product-option product-line" data-option-id="{{ option.id }}">
Which will look like this within the code:

Once you’ve completed steps 1, 2 and 3 save the changes to the product_form.twig file and move onto step 4.
Step 4
First, locate the checkout_basket.twig file by selecting from the menu of the page editor. This file holds the code which generates your website's shopping basket page. Within this code you will see HTML elements which begin with <td.
You will need to locate the <td element which contains a basket-item-image class. This code will look something like this:
<td class="basket-item-image" data-fit="0">
Which looks like this within the code:

Create a new line directly after this line and paste the following code into it:
{% set zakeke_preview_image_url = '' %}
{% if item.comments|length %}
	{% set opts = item.comments|split(' | ') %}
	{% for option in opts %}
		{% set name = option|split(':')[0] %}
		{% set value = option|split(':')[1] %}
		{% if name == 'Preview Image URL' %}
			{% set zakeke_preview_image_url = value %}
		{% endif %}
	{% endfor %}
{% endif %}
This should then look something like this:

Step 5
Then, within the <td class="basket-item-image" element from Step 4, locate the following line of code: {% if item.is_gift_voucher %}.
Warning: The code {% if item.is_gift_voucher %} exists multiple times within the file. It's important that you ensure you have found it in the correct part of the code. Once you have located the <td class="basket-item-image" element, the {% if item.is_gift_voucher %} code will appear before the closing </td> tag.
Within the file, delete the code from (and including) {% if item.is_gift_voucher %} to the next {% endif %} line.
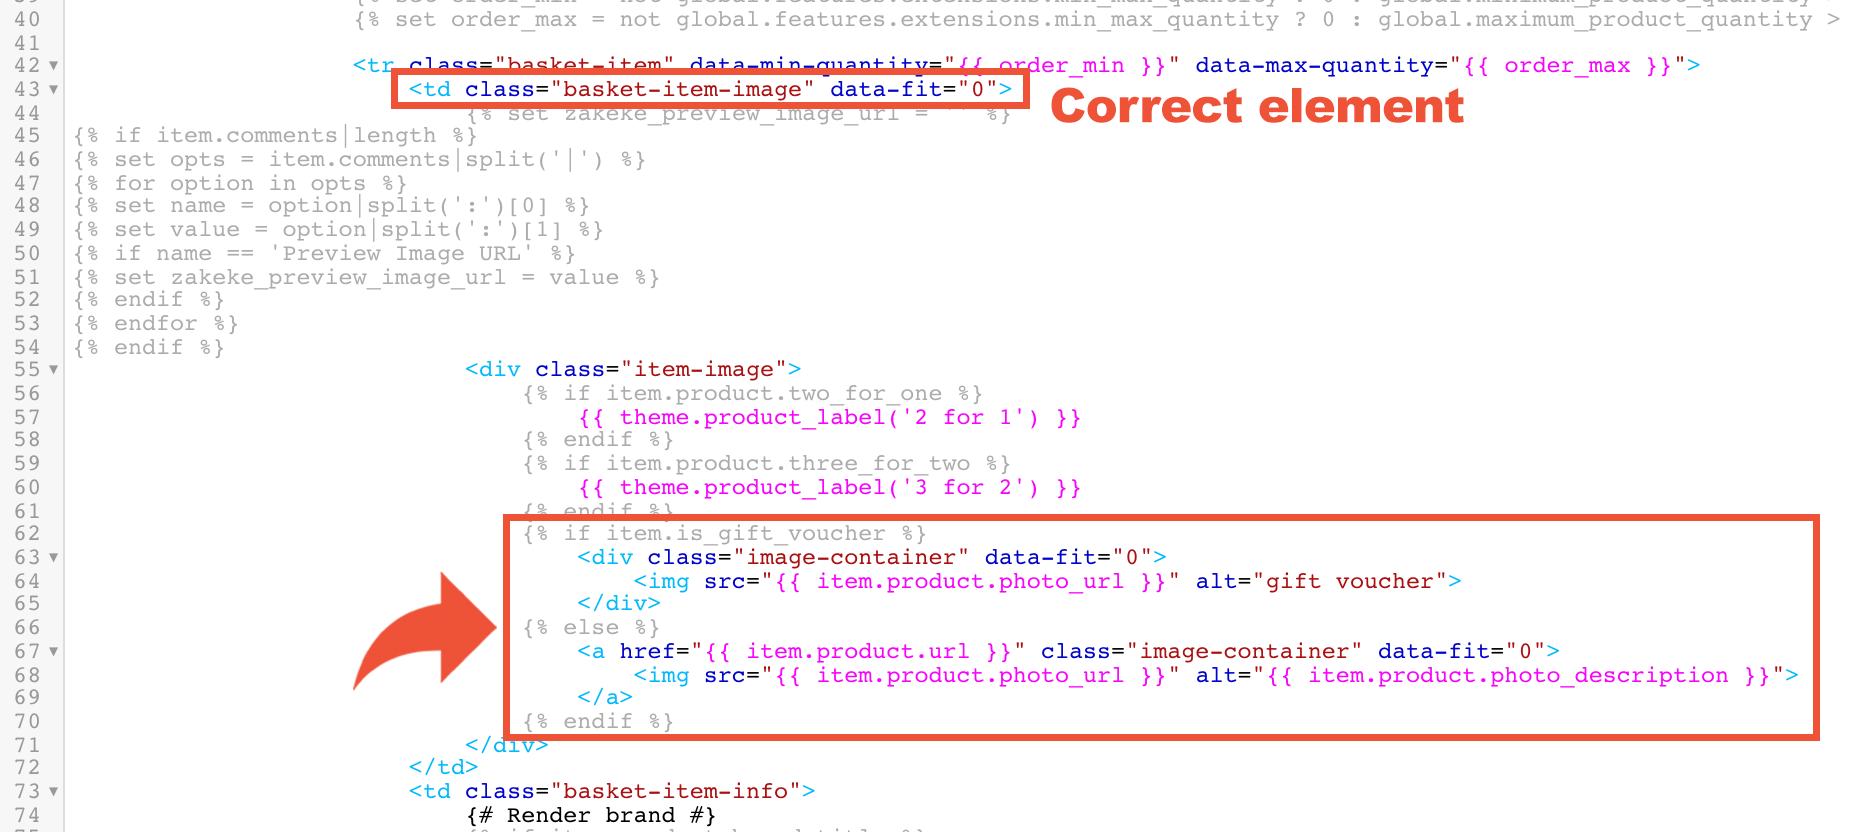
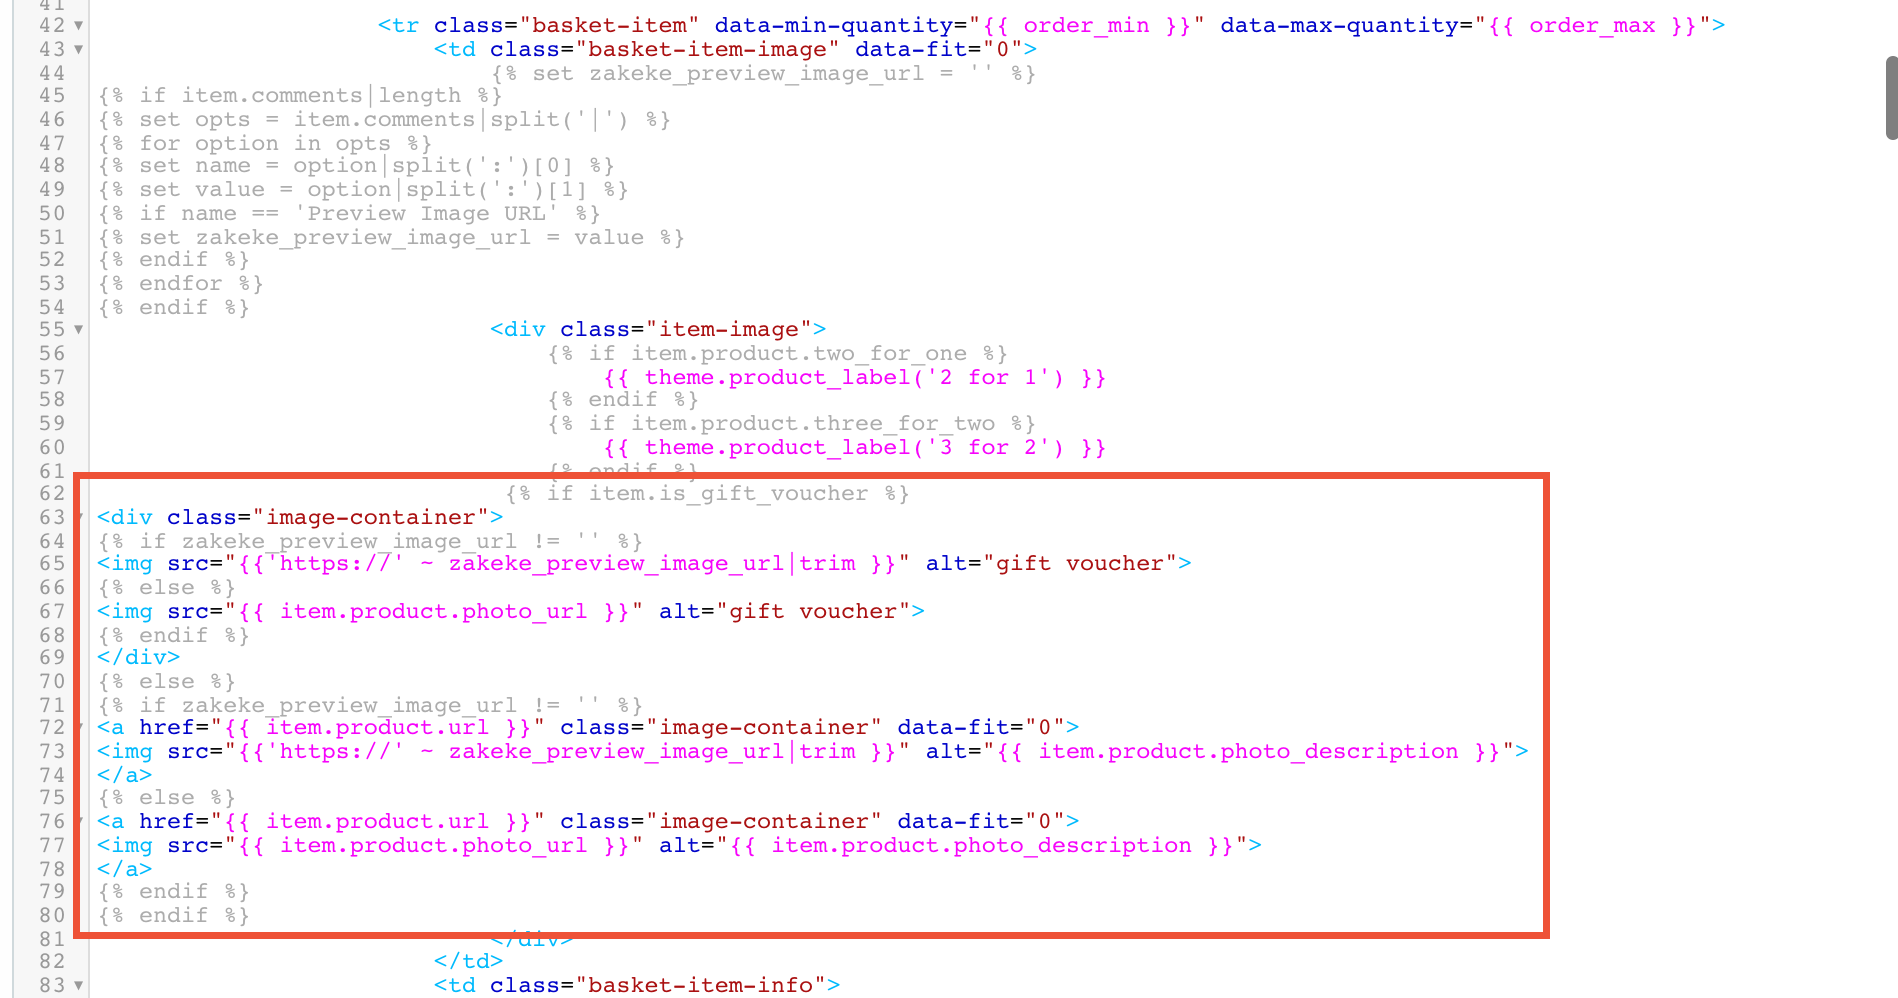
Then replace it with the following code:
{% if item.is_gift_voucher %}
	<div class="image-container">
		{% if zakeke_preview_image_url != '' %}
		<img src="{{'https://' ~ zakeke_preview_image_url|trim }}" alt="gift voucher">
		{% else %}
		<img src="{{ item.product.photo_url }}" alt="gift voucher">
		{% endif %}
	</div>
{% else %}
	{% if zakeke_preview_image_url != '' %}
		<a href="{{ item.product.url }}" class="image-container" data-fit="0">
		<img src="{{'https://' ~ zakeke_preview_image_url|trim }}" alt="{{ item.product.photo_description }}">
		</a>
	{% else %}
		<a href="{{ item.product.url }}" class="image-container" data-fit="0">
		<img src="{{ item.product.photo_url }}" alt="{{ item.product.photo_description }}">
		</a>
	{% endif %}
{% endif %}
It should then look like this:
Step 6
Finally, locate the <td> element which contains a basket-item-info class:

Within this element, find the code which generates the item comments, which will look like this: {% if item.comments|length %}
Delete the code from (and including) {% if item.comments|length %} to the next {% endif %} line:
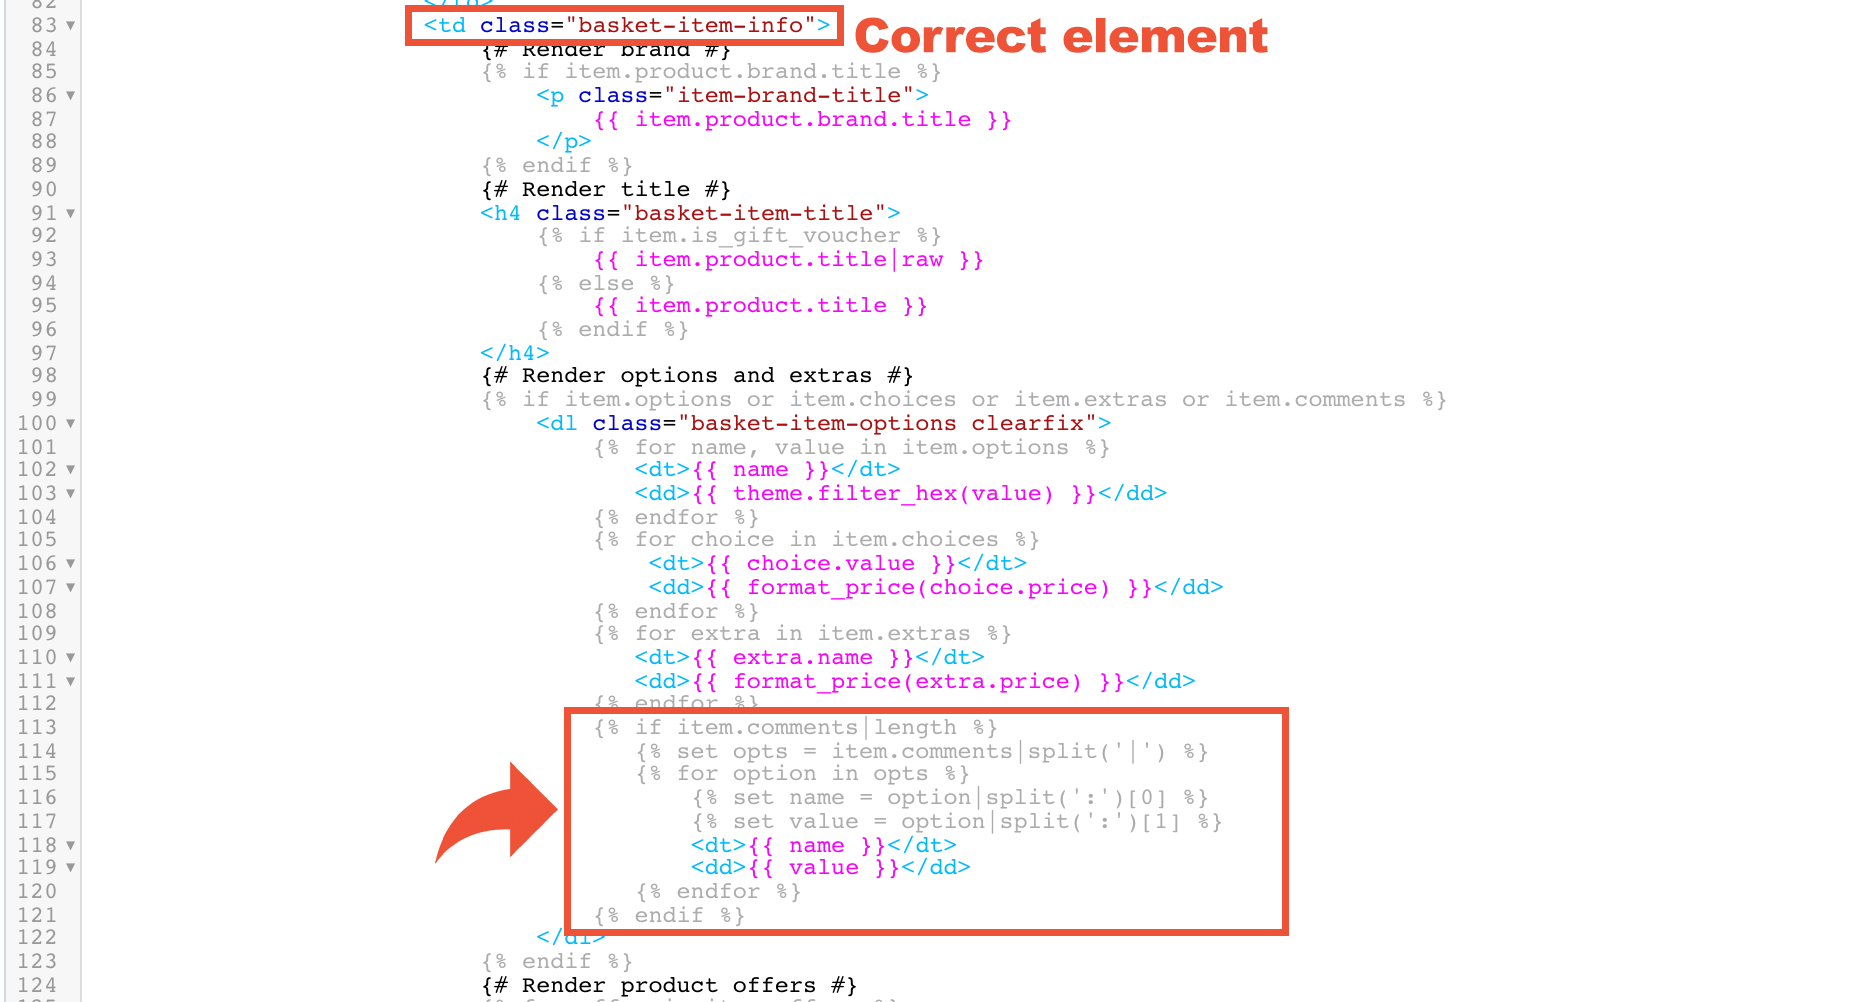
Then replace it with the following code:
{% if item.comments|length %}
	{% set opts = item.comments|split(' | ') %}
	{% for option in opts %}
		{% set name = option|split(':')[0] %}
		{% set value = option|split(':')[1] %}
		{% if name != 'Design ID' and name != 'Preview Image URL' %}
			<dt>{{ name }}</dt>
			<dd>{{ value }}</dd>
		{% endif %}
	{% endfor %}
{% endif %}
It should then look like this:
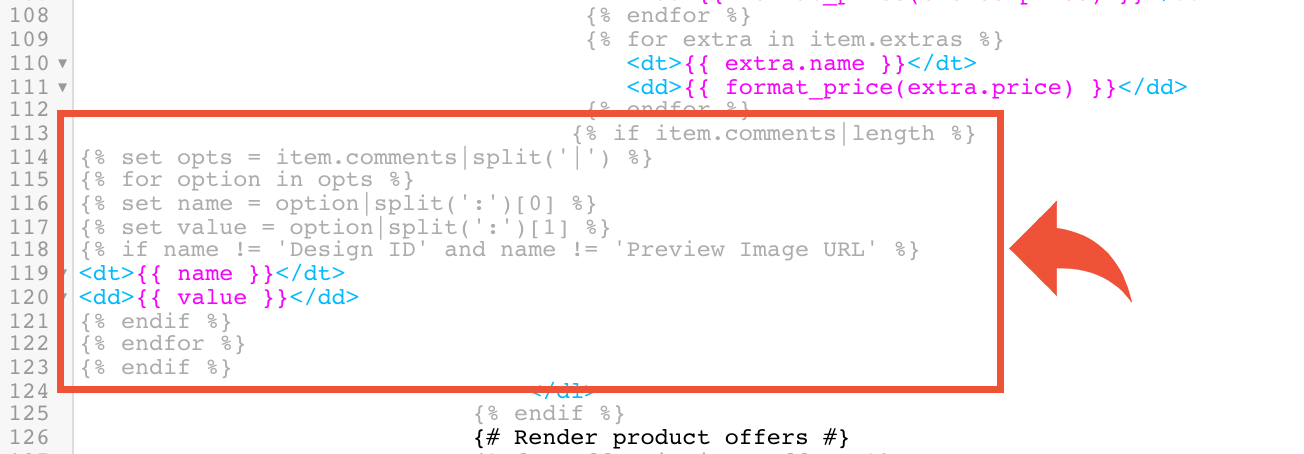
When you’ve finished, save your changes to the file.
Once you have added all of the code to your theme it is important that you test your website to ensure nothing is broken. If you find that something on your theme is no longer working, you should revert to the previous version of your theme’s code for both pages you changed, and then try again.
Please note!
Since this code is entered on your live theme, if at any point you change which theme you are using, you will need to place this code into your new theme’s files in order for it to continue to work.
Adding code to your live theme - Version 2 and earlier themes
If you are using a version 2 or earlier theme, please contact us for assistance with adding the code to your live theme.
Adding code to platform checkout
If you are using platform checkout you will also need to add some code into the advanced customisation section of the platform checkout settings. To do this navigate to your platform checkout settings by selecting from the menu. Then scroll to the bottom of the page and open the 'Advanced Customisation' section. In the 'Custom JavaScript' box enter the following code:
<script>
	const orderSummaryProducts = document.querySelectorAll('.order-summary__item');

	if (orderSummaryProducts.length > 0) {

		orderSummaryProducts.forEach(orderSummaryProduct => {

			const orderSummaryProductImage = orderSummaryProduct.querySelector('.order-summary__photo img');
			const orderSummaryProductExtra = orderSummaryProduct.querySelector('.order-summary__extra');

			if (orderSummaryProductExtra !== null) {

				if (orderSummaryProductExtra.innerText !== '' && orderSummaryProductExtra.innerText.includes('|')) {

					const orderSummaryProductExtraZakekeComments = orderSummaryProductExtra.innerText.split(" | ");

					if (orderSummaryProductExtraZakekeComments.length > 0) {

						for (const orderSummaryProductExtraZakekeComment of orderSummaryProductExtraZakekeComments) {

							if (orderSummaryProductExtraZakekeComment.includes('Preview Image URL')) {

								let zakekePreviewImageURL = orderSummaryProductExtraZakekeComment.split(":");

								if (zakekePreviewImageURL.length === 2) {

									zakekePreviewImageURL = zakekePreviewImageURL[1].trim();

									if (zakekePreviewImageURL !== '') {

										if (orderSummaryProductImage !== null) {
											orderSummaryProductImage.setAttribute('src', `https://${zakekePreviewImageURL}`);
										}

										orderSummaryProductExtra.style.display = 'none';
									}
								}

								break;
							}
						}
					}
				}
			}
		});
	}
</script>
Then select to save your changes.
Creating configurable and customisable products
For products to be configurable or customisable, you will need to create the products within Zakeke. To do this navigate to your Zakeke account and select to use either the customiser or the configurator:
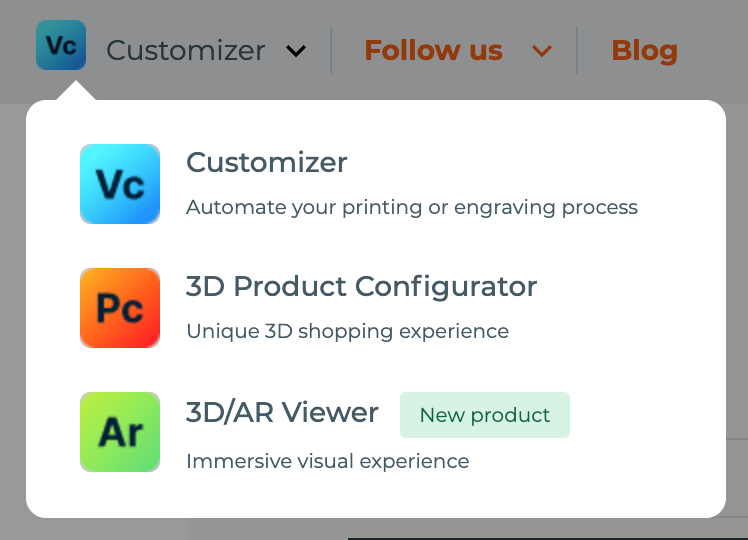
Customiser
On the product customiser select Customizable Products > Add.
The products from your ShopWired store will then be listed within the 'Connect Catalog' for you to choose from. Select which product you would like to customise and follow these instructions from Zakeke for customising the product.
Important!
If you have variations on any of your products, when creating customisable products within Zakeke it is important that you import all of your available variants. While this currently goes against Zakeke's own guidance, it will ensure a smooth user experience for customers on your website.
Products that you have customised will appear in the '2D Customisable Products' section within the ShopWired app:
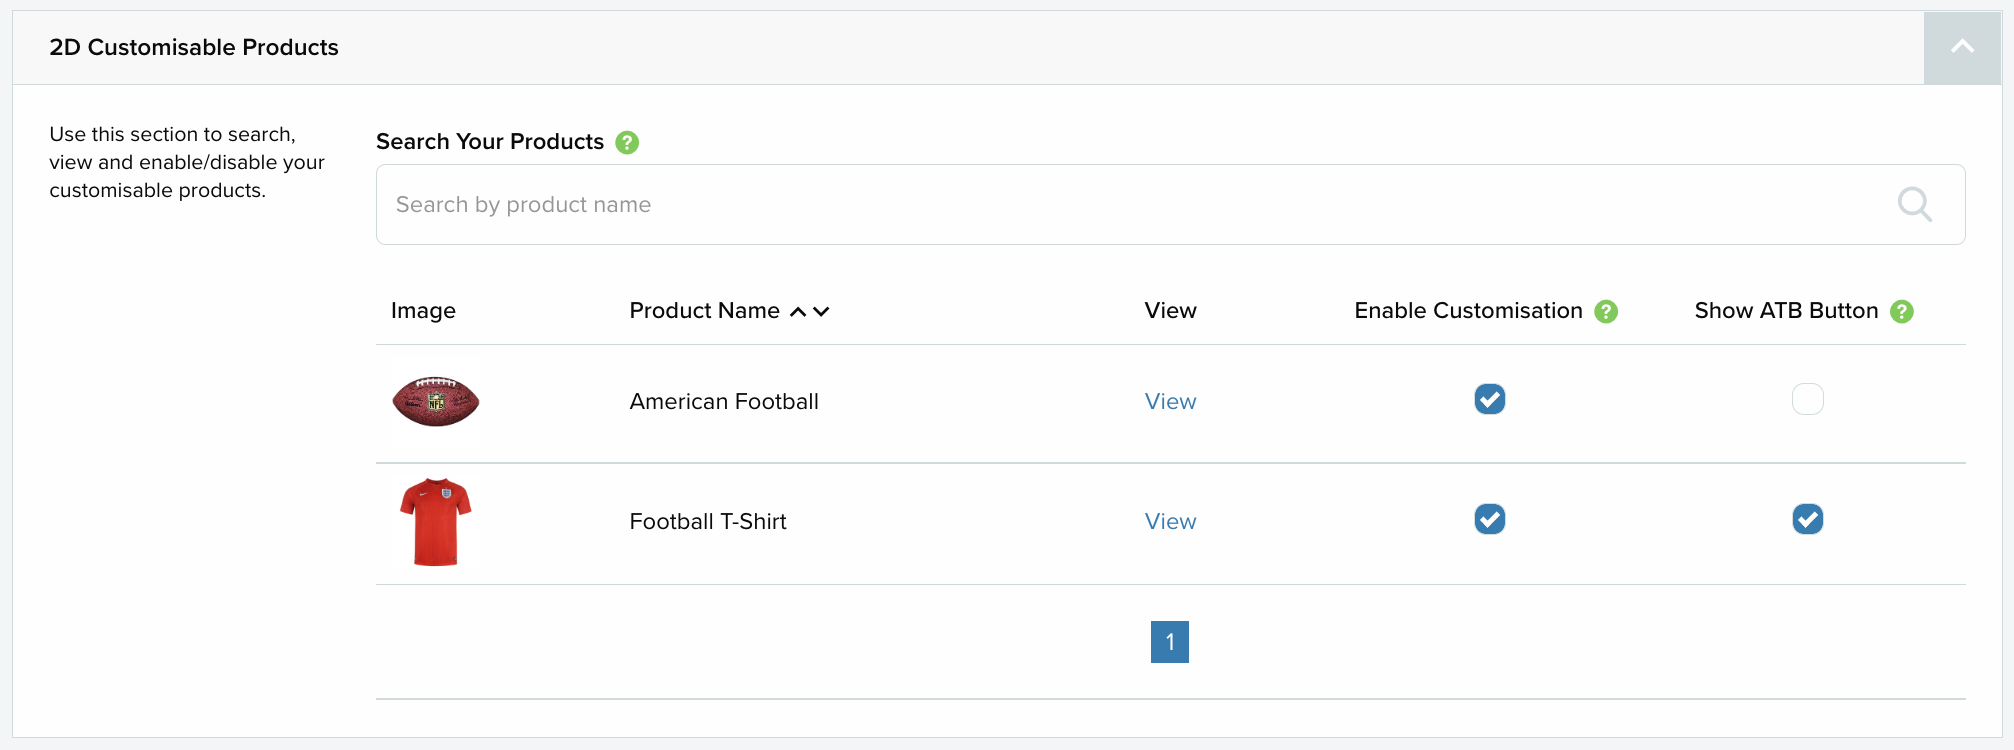
Within this section you can select to disable or re-enable the customiser on the products on your website. If you have enabled the customiser for a product, you can also choose if you want the 'Add to Basket' button to show in addition to the 'Customise' button. This option is useful if you have variations for a product which don't need customising.
You can also select View to see the product on your website.
Configurator
On the product configurator select from the side menu.
Then select + ADD NEW PRODUCT in the top right corner. The products you have created within your ShopWired store will then be displayed for you to choose from. Select which product you would like to configure and then follow this set of guides from Zakeke for configuring the product.
Important!
If you have variations on any of your products, when creating configurable products within Zakeke it is important that you import all of your available variants from ShopWired. Creating variations on Zakeke instead of creating them in ShopWired and then importing them to Zakeke will cause issues on your website.
Products that you have configured will appear in the '3D Configurable Products' section within the ShopWired app:
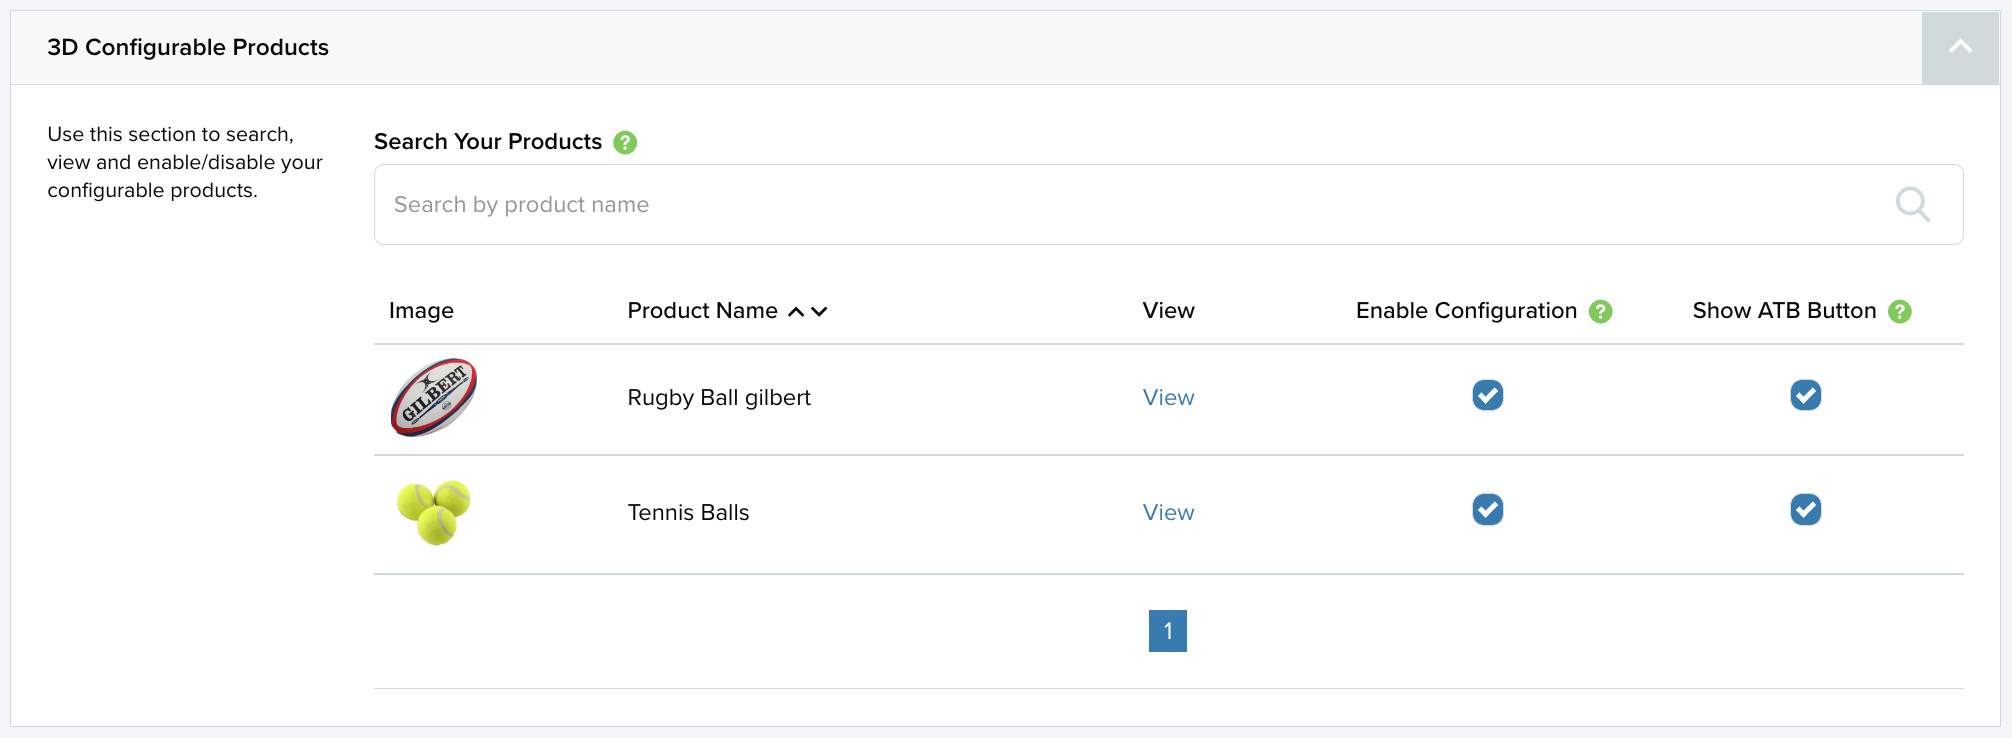
Within this section you can select to disable or re-enable if the products should be configurable on your website. If you have enabled for a product to be configurable, you can also choose if you want the 'Add to Basket' button to show in addition to the 'Customise' button. This option is useful if you have variations for a product which don't need configuring.
You can also select View to see the product on your website.
App settings
Use the 'App Settings' section to configure the following settings:
Offline payment orders
Enable this setting to have any orders placed using the 'offline' payment method be automatically sent to Zakeke. If this setting is not enabled, offline payment orders won't automatically send to Zakeke due to having an 'Unpaid' status and will instead appear in the 'Order Export Errors' section.
Customise Button Text
If you want to change the default text of the 'Customise' button, use this field to enter what text you want to display on the button. Then select save changes. To see the changes on your live website you might first need to clear your cache.
User experience
Products on your website that have been created in Zakeke to make them customisable/configurable will then show on your website with a 'customise' or 'configure' button instead of with an 'add to basket' button:
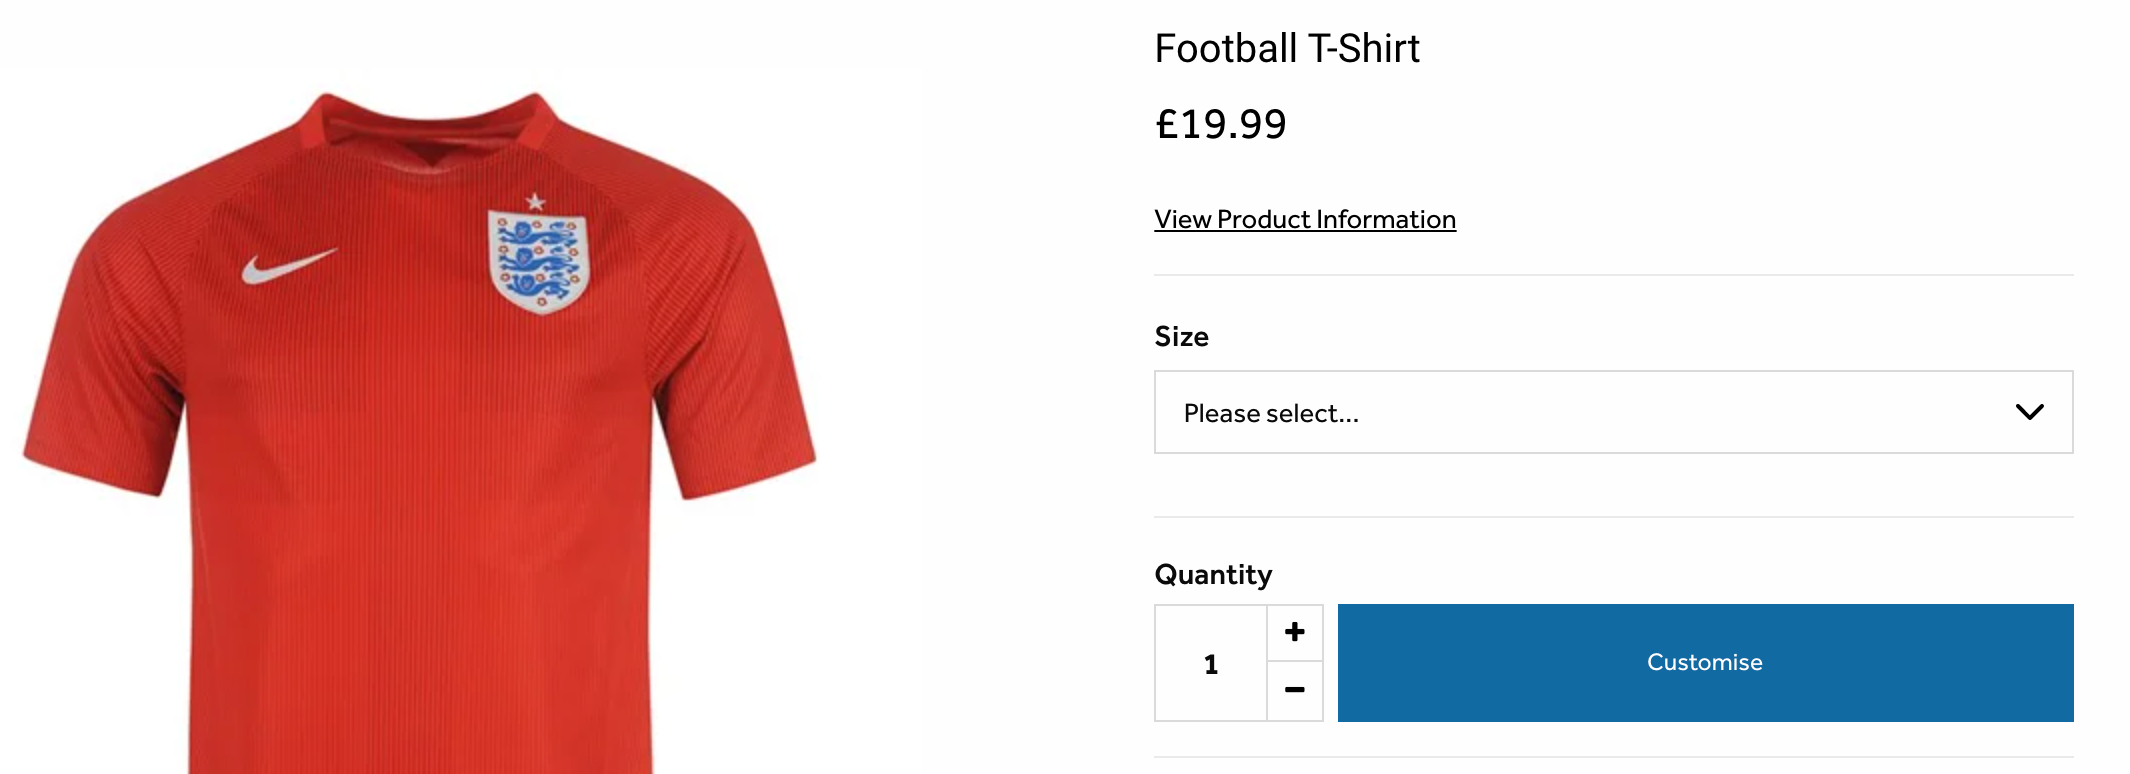
When visitors to your website wish to purchase one of these products, they will need to click this to open Zakeke's customisation tool. This tool allows users to make customisations to the product in line with how you have created the product within Zakeke:
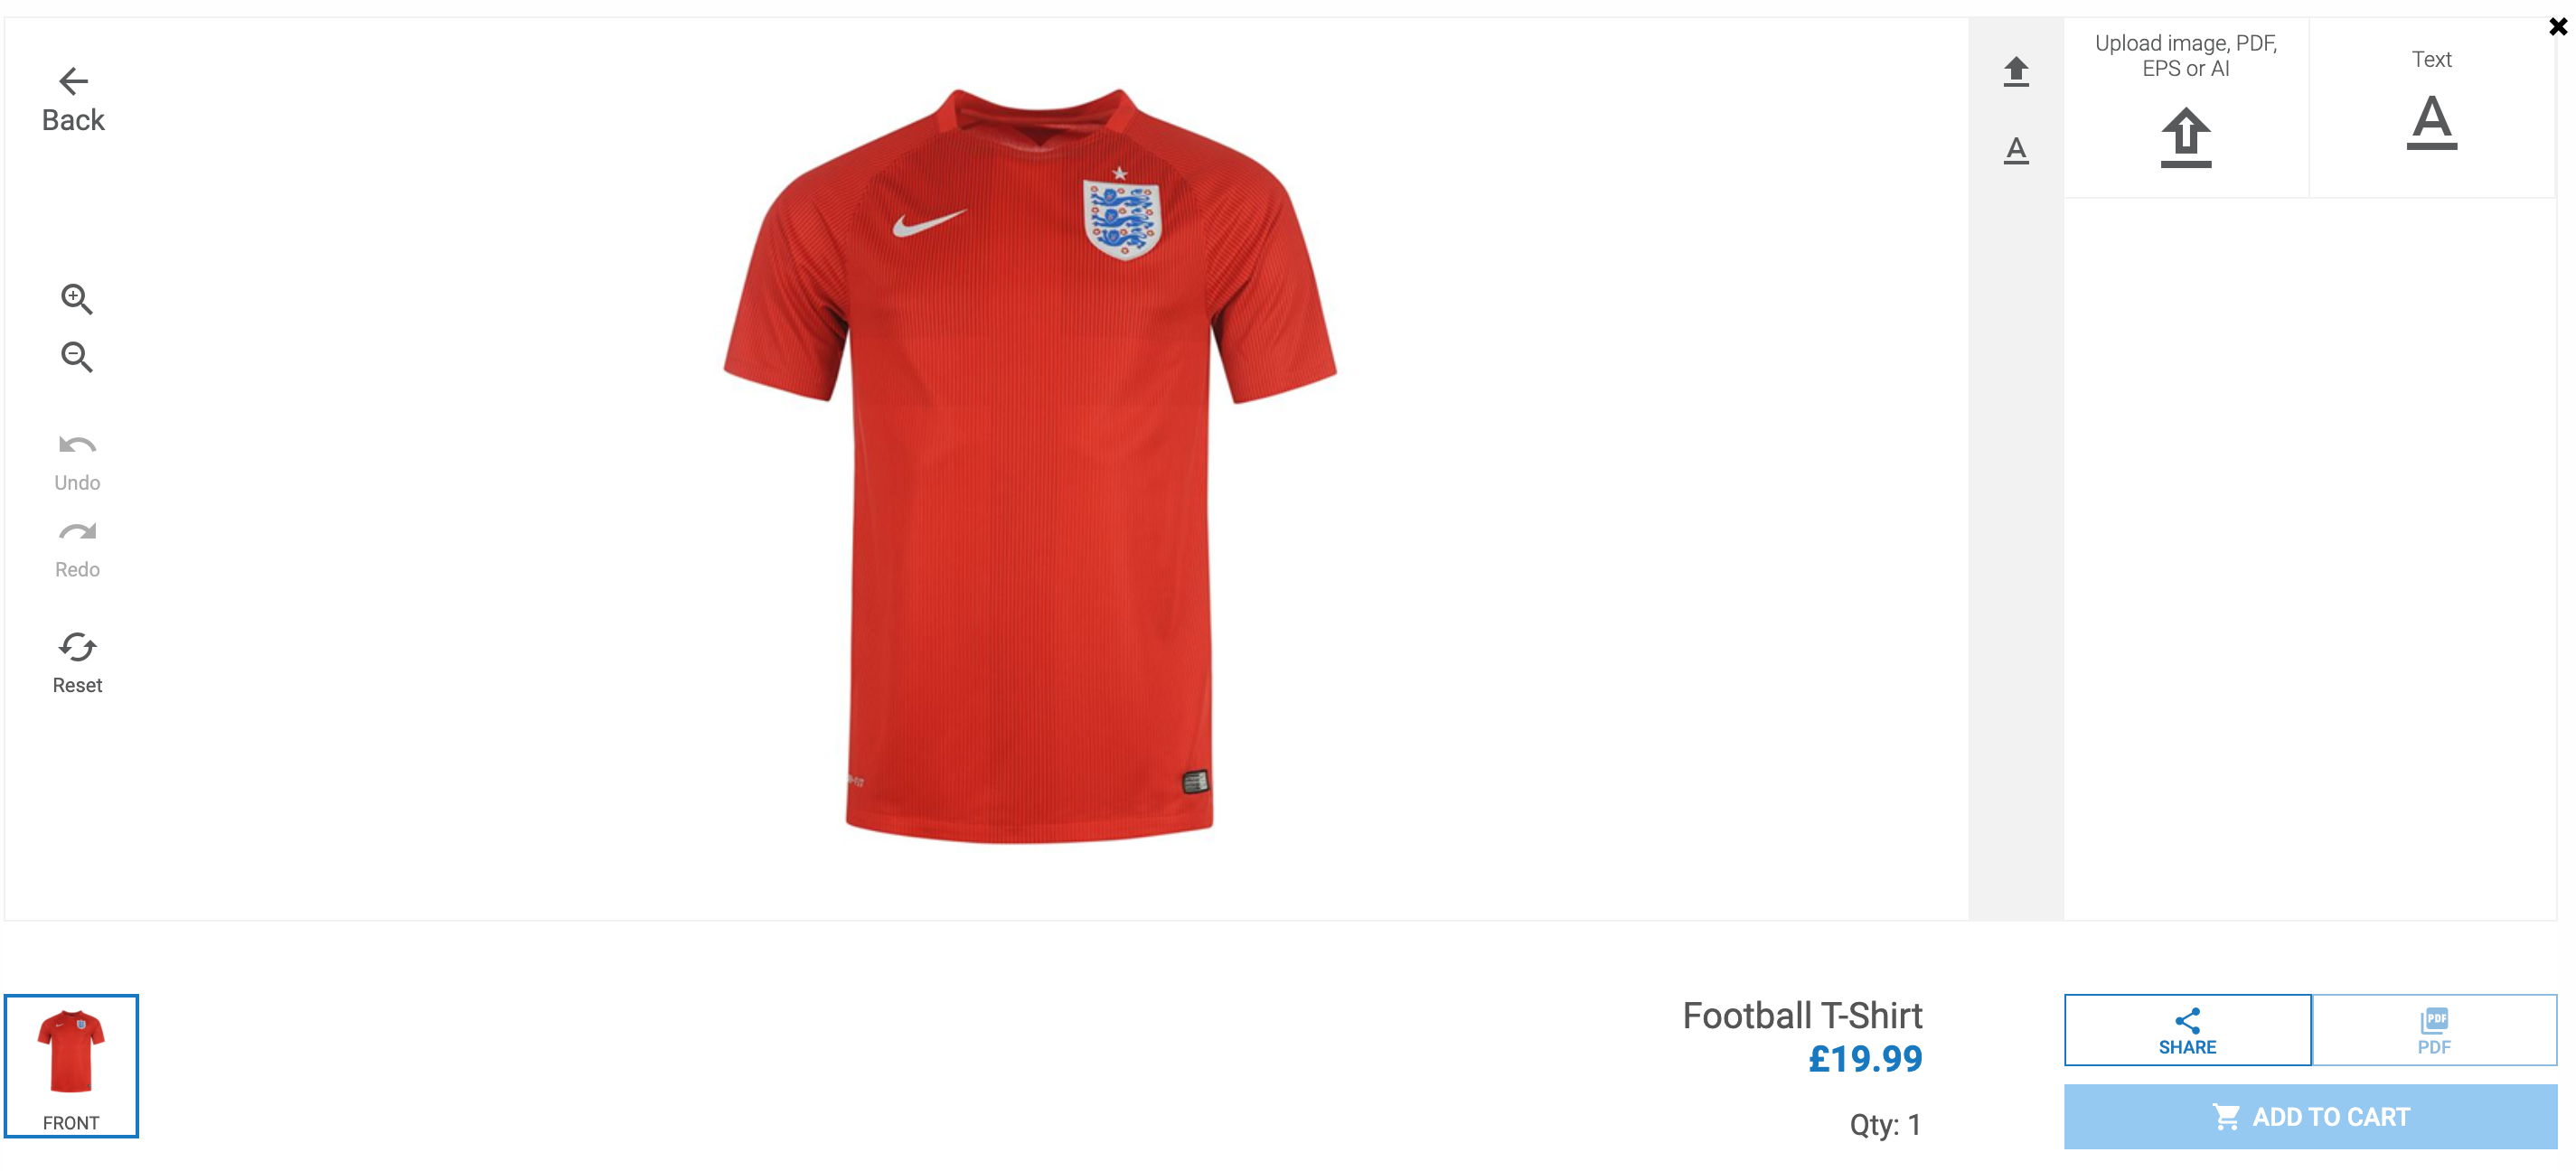
Please note!
The content of Zakeke's customisation tool is provided enitrely by Zakeke and cannot be altered by us.
The user can then add the product to their basket and purchase it as normal.
Order export errors
Occasionally the app may encounter an error when trying to export an order to Zakeke. When this happens, the details of which order failed to export will be displayed in the ‘Order Export Errors’ table:

For each order that fails to export, the error returned by the system will be displayed. You can then try to fix the error and select to retry the export.
